Posts

Slide Back Saturday - Merry Tags - Stampin Up

Image
Whilst we are busy concentrating on making cards and buying Christmas presents we often forget that when giving a gift the first thing you look at is the little gift tag. A simple wrapped present can look all the more special with a pretty handmade gift tag. I've chosen the 'Merry Tags' framelits dies, cutting two shapes to make each tag. One is a plain bauble shape the other has a pretty cut out design so when layered in different colour cardstock it allows the underneath to peak through.  The colours chosen here are 'Whisper White' and 'Fresh Fig', what a gorgeous, ,rich colour it is and a break from the traditional reds and greens. Silver 1/8 inch ribbon is the perfect width to slip through the tag top.  To package these in sets of 10 i have taken the 'Bigz Top Note' die, scored it in half so it sits along the top of a clear cello bag. A staple either side ensures the top stays closed and tags won't slip out of the bag.  T...

Merry Mistletoe

Image
Keeping it simple is key to not getting stressed if you have lots of Christmas cards to make. This card is super simple and you don't need lots of items. Perfect for the person just starting out in crafting as you don't even need a 'big shot' either! 'Merry Mistletoe' is the stamp set used for the deer and garland. The sentiment comes from 'Merry Patterns', i like this because it's the perfect size to fit into the label punch.  A little red gem from my craft stash is used to give one reindeer his red nose and the gorgeous gold glimmer paper (yes i know i am using this quite a bit...ok well a lot, but it really is fabulous) to give a hint of sparkle.  So easy you could sit and stamp a stack of these in no time at all.  If you fancy having a go yourself and would like to order any Stampin Up products you can do so 24/7 HERE   Any question please do get in touch rachhome@msn.com Rachael x

JOY - with Stampin Up

Image
Are we all feeling excited that tomorrow is the 1st of December? I absolutely love Christmas time, so i really enjoy the whole of December.  This card i made uses the word 'JOY' which sums up how i feel about the festive period. I have made this card using the same dsp but switched the colours around, so one is more 'Cherry Cobbler' and the other more 'Garden Green'.  They are simple to make. Taking a piece of cardstock 9 x 3 inches score on the long side at 3 and 6 inches. This gives you the folds so that it will fit into a 3x3 inch envelope.  The 3 pieces of dsp from the 'Be Merry' papers measure 2 7/8 inch square. This gives you a hint of border around all four sides.  I chose a pattern with mittens on so decided to use the 'Many Mittens' framelits to cut out the 2 mittens and the little tree from the matching stamp set 'Smitten Mittens'  'JOY' i wanted to stand out against the papers so of cou...

18th Birthday - Stampin Up large numbers

Image
Hello, just a really quick card to show today as it's my Nephews 18th birthday.  I chose the colours 'Dapper Denim' and 'Lemon Lime Twist' to match the dsp.  Added some sparkle with the 'Gold Glimmer paper' by cutting out 18 using the large number dies. Quick and easy to make and the colours and numbers could be changed to match any age.  If you would like to buy any Stampin Up products please do so HERE   Rachael x

Slide Back Saturday with 'Be the Star' at Christmas - Stampin Up

Image
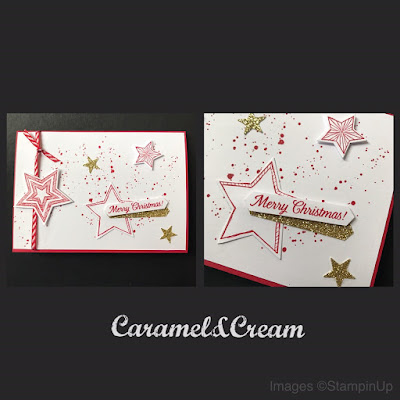
'Gorgeous Grunge' is one of my favourite stamp sets for creating backgrounds. It's a set that i just can't bring myself to get rid of even though it has been retired.  Here i have used the splatter effect in 'Real Red' ink.  The stars stamped in the same colour come from the 'Be The Star' stamp set and are cut using the matching 'Star framelits'....a bonus to save you from having to fussy cut them all. Ribbon in coordinating colours adds interest and i just love our glimmer papers. I seriously can't stop using them on my Christmas projects! Here i have taken the 'Gold Glimmer Paper' and punched out some little stars and a strip to sit behind the sentiment.  I think i will be making lots more of these but in different colours.  If you would like to order any Stampin Up products you can do so HERE   Rachael x

Christening card for my niece.

Image
So if you saw my post yesterday you will know this card was made for my nieces Christening. (If you didn't see yesterdays post pop back and take a look, i shared a cute card made for her adoption day) 'Inspired Events' is the perfect stamp set for those special baby / childrens occasions. It's a photopolymer stamp set so you can see exactly where you are placing the beautiful script wording.  I chose the colour 'Sweet Sugarplum' and just a hint of 'Smoky Slate' for the cross. The gate / border panel effect is so pretty that you really don't need to use too much else with it.  Rose buds are also in the same stamp set, i simply inked up the base flower image first but then stamped off onto some scrap paper to lighten it a shade. I then went back over with the more detailed flower stamp but kept the colour at it's fullest to let the detail stand out.  Once dry i gave a swish over with some 'Wink of Stella' to give a love...

Twinkle Twinkle little star.

Image
Some of you may know that recently my baby nieces adoption was finally made official. It's been a long wait but everyone in the family is thrilled that she can now have her permanent family name registered.  I wanted to gift something for her special day so i decided to have a star named after her and of course i needed a card to go along with it too. The 'Moon Baby' stamp set and it's wording 'Twinkle Twinkle little star' seemed so apt for the gift i had chosen.  Pretty floral dsp was used to cover the card base then a layer of 'Whisper White' card cut slightly narrower to give a border at the sides.  I stamped the moon and baby image onto some scrap 'whisper White' card stock first then coloured it in using my aqua pen and inks. Using scissors to fussy cut the image meant i could then mount it on some dimensionals to give some depth to the card.  'Basic Black' ink is used for the wording. Lastly some ribbon and 3 st...